Table of Contents
DUPLEX video transmission with multi-channel sound using vMix Call
There are several ways to connect a remote location to the studio via the Internet. One of the ways is SRT, another is NDI. Both ways have advantages and disadvantages.
- SRT, only the expensive Haivision or Matrox encoders/decoders have multichannel audio. All cheap encoders have only 2-CH audio. SRT also requires router management (port forwarding) which is not possible in every location. But if two sets of Haivision SRT encoders and decoders are available, this is the most reliable variant with 8-CH audio, with low latency.
- NDI, RX and TX must be on the same subnet of a network. This is also practically never the case with remote productions. Since NDI 5.5 there is the NDI Bridge, which should solve exactly this network problem, but even with NDI Bridge you need a router management (port forwarding). So the same problems as with SRT, only that NDI Bridge is extremely unreliable.
There is also a vMix specific variant, which is actually quite reliable, but does not provide the best picture or audio quality. For a duplex production of a call, or the transmission of such a call to another location, the quality is sufficient.
If vMix is available on both sides and both sides have a decent internet connection (20Mbits up/down), this solution is in my opinion the easiest! and most reliable.
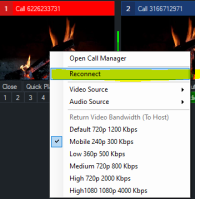
Known disadvantage, audio and video diverge over time, this can be solved with RECONNECT, on the Remote Location page. So, in a break or shortly before the start of a panel, make reconnect on all vMix channels.
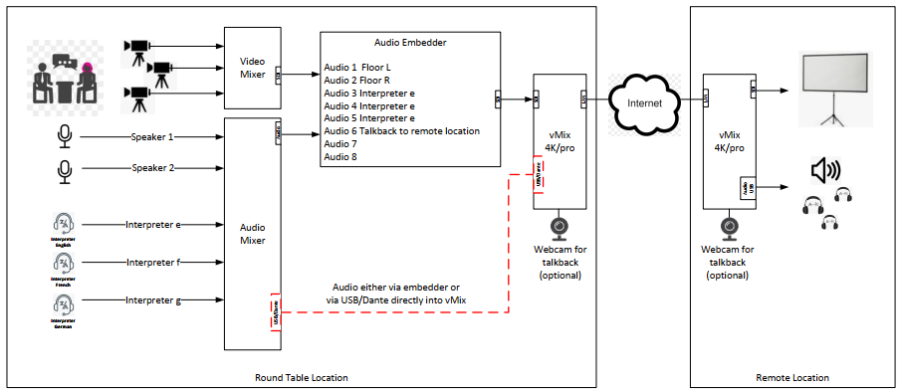
Example Broadcast a panel of 8 audios to another location
Setting up Round Table Location
In this example, the signal to be transmitted is available as SDI (8-CH) embedded. This signal goes into a vMix system with SDI input.
vMix
-start a new project. Since this signal is transmitted progressively via WEBRTC, a 25p signal could be selected as the project format.
Inputs
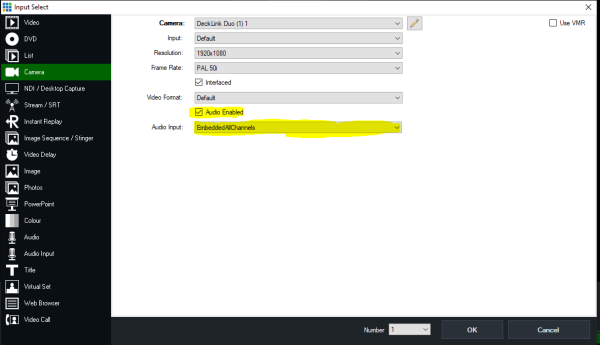
-Select a camera (SDI) input. Set audio to embedd all channels.
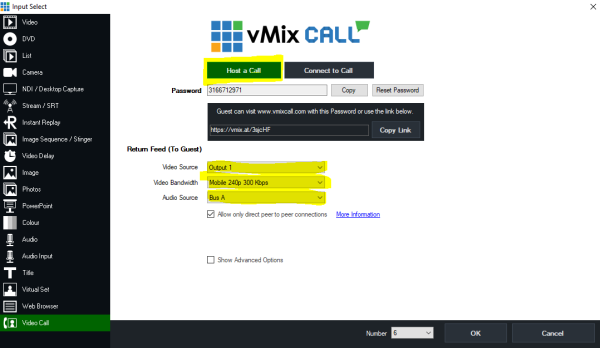
-1. Select first vmixcall input.
This is the broadcast channel for the video and the first two audio tracks (M).
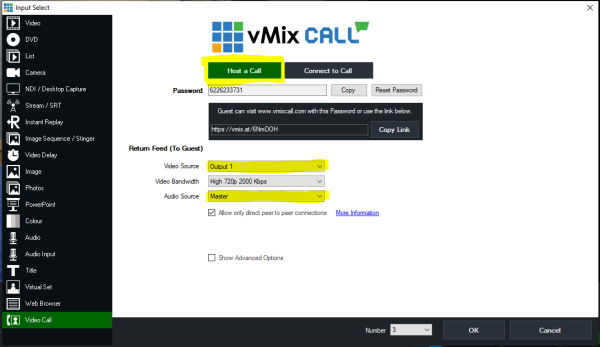
-2. Select second vmixcall input.
This is the send channel for the second two audio tracks (A). To save bandwidth, the video quality can be set to the lowest setting. Audio is always the same and is not affected by this setting.
 \
\
-3. Select third vmixcall input.
This is the send channel for the third two audio tracks (B). To save bandwidth, the video quality can be set to the lowest setting. Audio is always the same and is not affected by this setting.
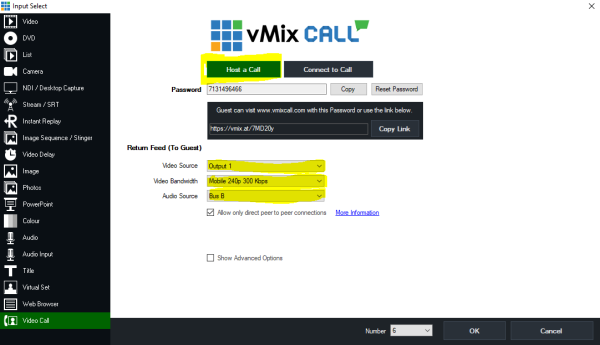
If necessary, another vMixcall input could be set for the fourth two audio tracks (C).\
Set channel matrix for inputs
Input 1 (SDI input)
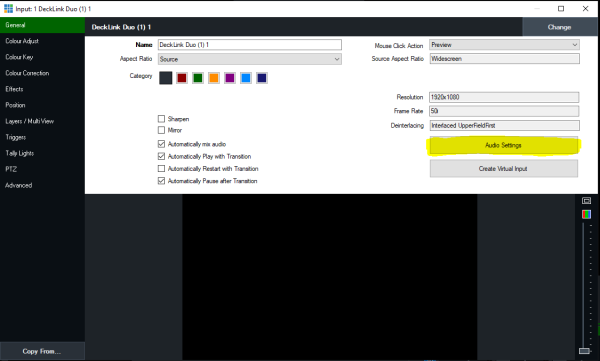 \
Then set the matrix so that all channels are distributed to the 8 audio tracks. I deliberately set the monitoring of input 1 to something usable, in this case the floor stereo signal. If all tracks are selected there, you also have all interpreters on your ear at the same time.
The matrix setting can also be saved as a preset. The preset is then available for all projects.
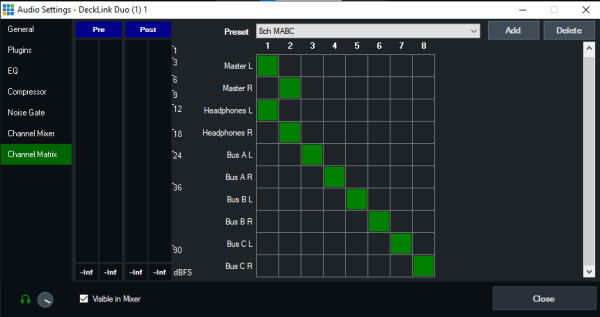 \
Now distribute the 8 inputs from the SDI input to the 8 outputs of vMix(MABC). Switch on audio and switch off audio follow video.
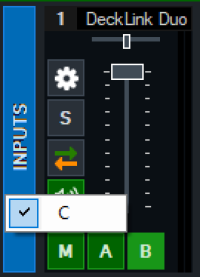
Now the 8 audio tracks are distributed to the 8 output tracks of vMix. “C” can be reached by right clicking on the buttons M,A or B.
M1 floor L
M2 floor R
A1 interpreter e
A2 interpreter f
B1 interpreter g
B2 talkback mic (optional)
C1 -
C2 -
That's it, leave the computer on the internet and let it run. The rest is done by the remote location.
Set up Remote Location
The Remote Location has a vMix computer and provides the signal as SDI embedded.
vMix, start new project, in the required format. e.g. 1080i25
Inputs
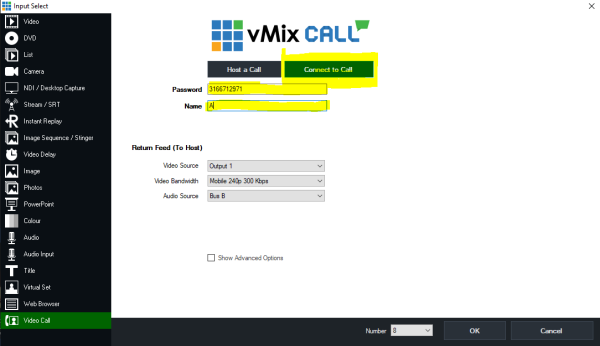
Open three vMix calls as Connect to Call, with the three connection numbers from the Round Table location.
-1. Select first vmixcall Input, BUT AS CONNET TO CALL!
This is the receive channel for the video and the first two audio tracks (M).
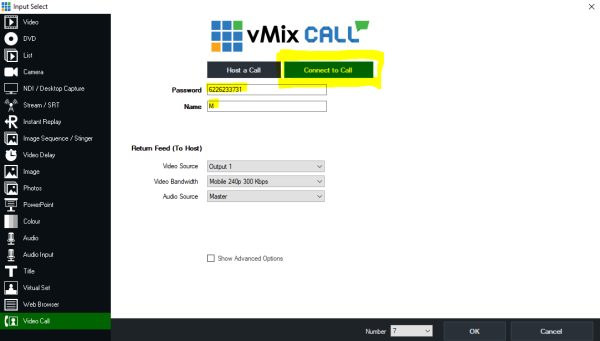
Set audio matrix to M.
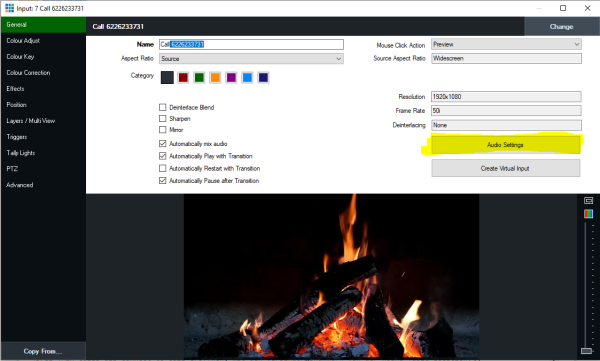
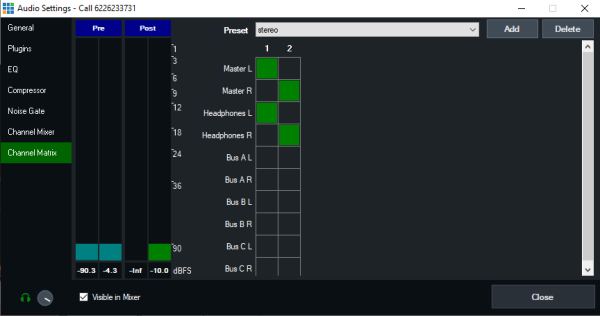
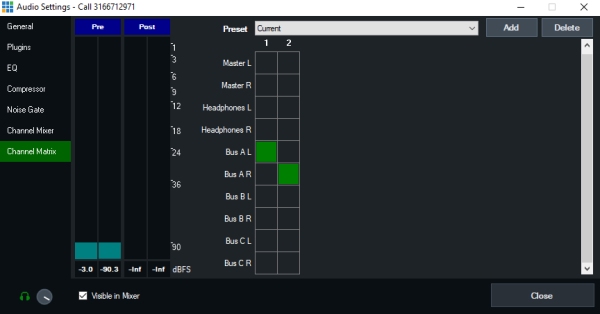
-2. Select second vmixcall input, ALSO AS CONNET TO CALL!
This is the receive channel for the second two audio tracks (A).
Set audio matrix to A.
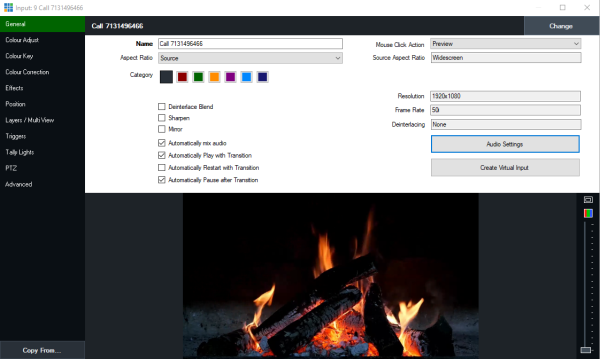
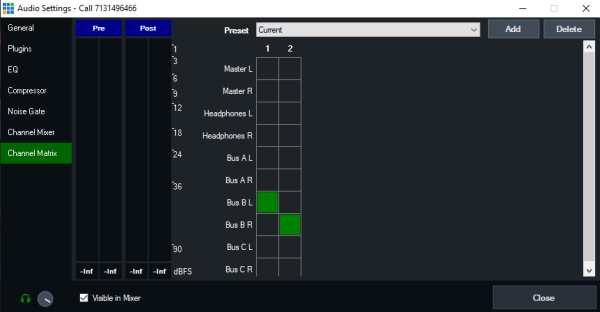
-3. Select third vmixcall Input, ALSO AS CONNET TO CALL!
This is the receive channel for the second two audio tracks (B).
Set audio matrix to B.
If necessary, another vMixcall input could be set for the fourth two audio tracks (C).\
Output
Distribute the audios of the inputs. Call1 to M, Call2 to A, Call3 to B.

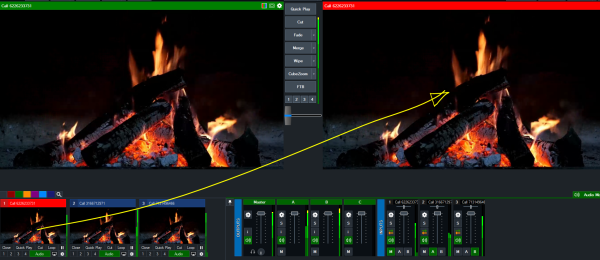
Set Call 1 to Output1.
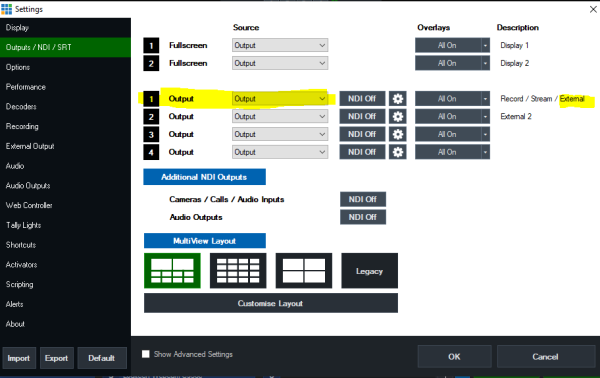
In Settings→ Output, Output1 must be set to Output.
Now you have to define an SDI output for the video signal as SDI embedded. Important: for Audio Channels MABC must be selected. Then add Call 1 to the output window of the vMix.\
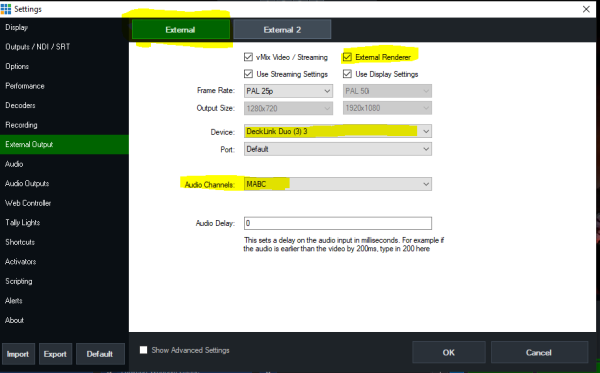
and switch on External

Known disadvantage, audio and video diverge over time, this can be solved with RECONNECT, on the Remote Location page. So, in a break or shortly before the start of a panel, make reconnect on all vMix channels.
This should bring out an SDI signal with the 8 tones.
Options
If talkback is desired, a WEBCAM or even a separate audio channel from the external mixer can be switched in. Simply connect an additional vMix call, route it via audio matrix to a channel that is not yet in use, and do the same on the receive side.
In this setup, no signal from the remote location is used on the round table side. However, the vMix computer provides one. So you could set an SDI input from the remote location computer to Output2, select Output 2 in the call1 window with the right mouse button, then this signal is available at the round table computer and can also be output as SDI signal via External 2.

